It’s been just over a year since I last relaxed my hair and about four months since I chopped off my ends and though I still find natural hair quite laborious, I thought I’d diversify my use of protective styles. Lately I’ve been wearing weaves and braiding my hair, but when I wear weaves, I always find either the cornrows or the thread so itchy that I nearly want to pull my hair out – so I wanted to find a decent alternative that is also summer friendly. My solution? Wigs.
You’d actually be surprised at how many people actually wear wigs as opposed to weaves – it’s quick to put on in the morning and if you don’t glue it in or sew it down, you can just take it off before bed; the styles are so versatile that you can literally be a different person everyday and you can save yourself some time spent in the salon. Yup – you can do them all by yourself.
If you follow me on social media, you’d know that that’s exactly what I did. I ordered some hair on cyber Monday and took to the challenge of making a wig all by myself. I’m going to break this blog down into different parts: where I got my hair/AliExpress shopping; what you need to make a wig and tips/advice to wig-making.
AliExpress Hair Shopping
If you go on Youtube and watch hair reviews, you’ll see that the majority of those Youtubers buy thier hair from AliExpress. But if you go on AliExpress, you’ll see that there are literally thousands of hair vendors to choose from and it’s a bit overwhelming. Yes, you could try your luck with IG boutiques but many times, they buy their hair from AliExpress too and you’re paying one massive markup. This is where some basic hair knowledge comes in.
Tip: obviously you want inexpensive hair, but don’t buy cheap hair. Make sure that your hair is at least 7A grade (8A if you have any intentions on sewing in your hair or dying it) and my preference of origin is Peruvian or Malaysian hair. Also try your best to shop the sales (so festive season is the greatest time to buy your hair!) and read the reviews, check how many orders they’re processed and their general rating. Sometimes vendors will try and entice buyers to give good ratings, but if there’s a vendor that’s sold over 500+ orders of one type of hair, their hair is rated 4* and up and they have a lot of good comments, you can be pretty sure that they actually have good hair. Also, don’t buy hair that is sent via China air mail. Not only does the shipping take too long, but it’s likely that things can go wrong in such an expensive purchase. Try and find a vendor that uses a reputable courier company like DHL and FedEx.
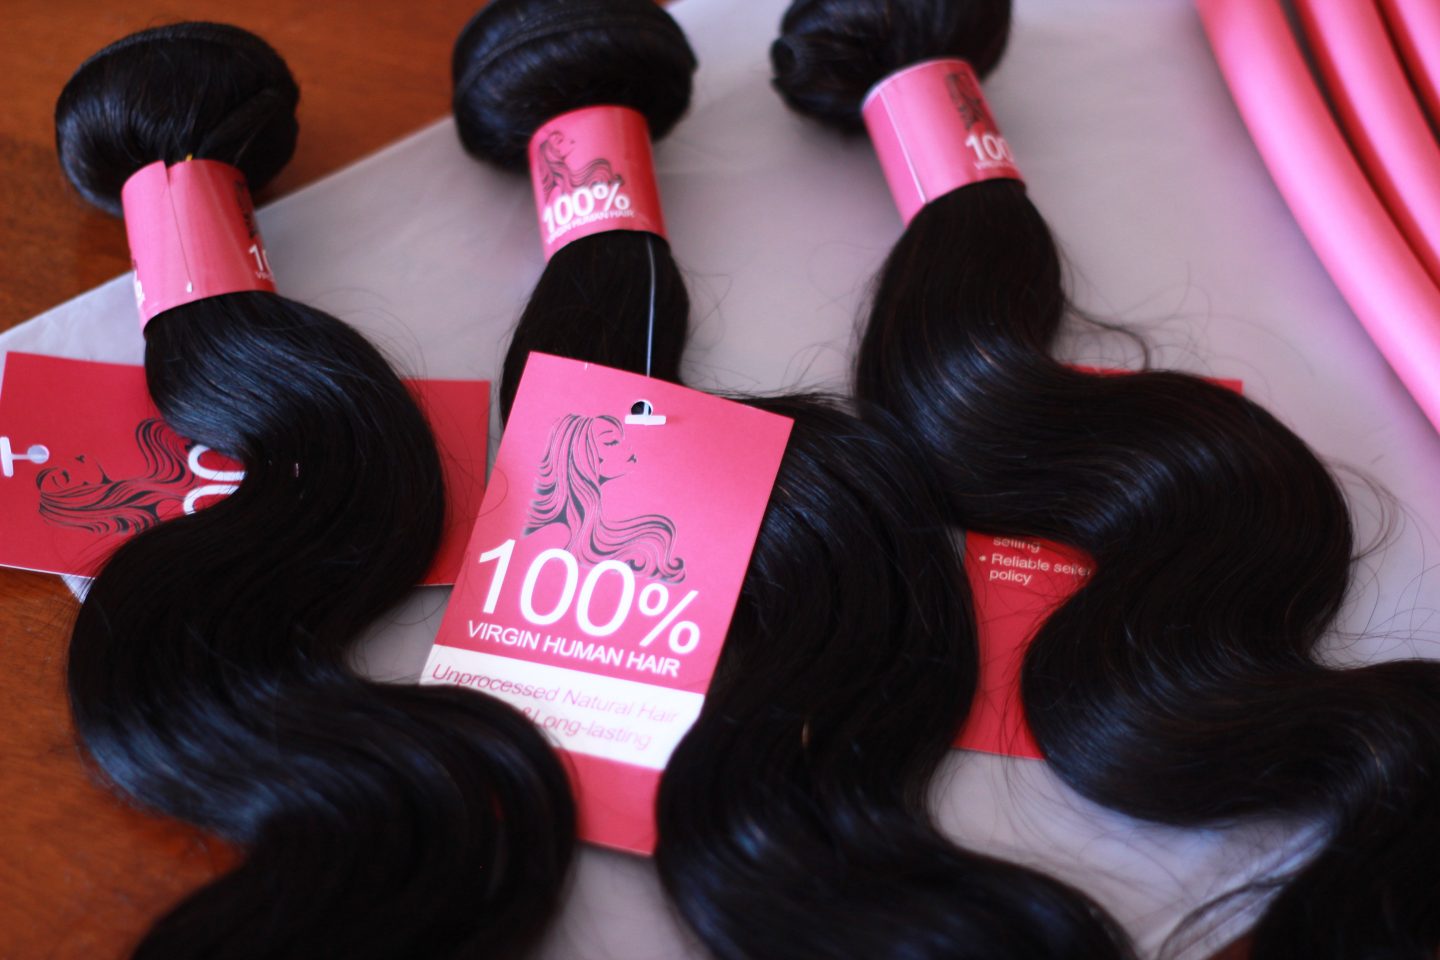
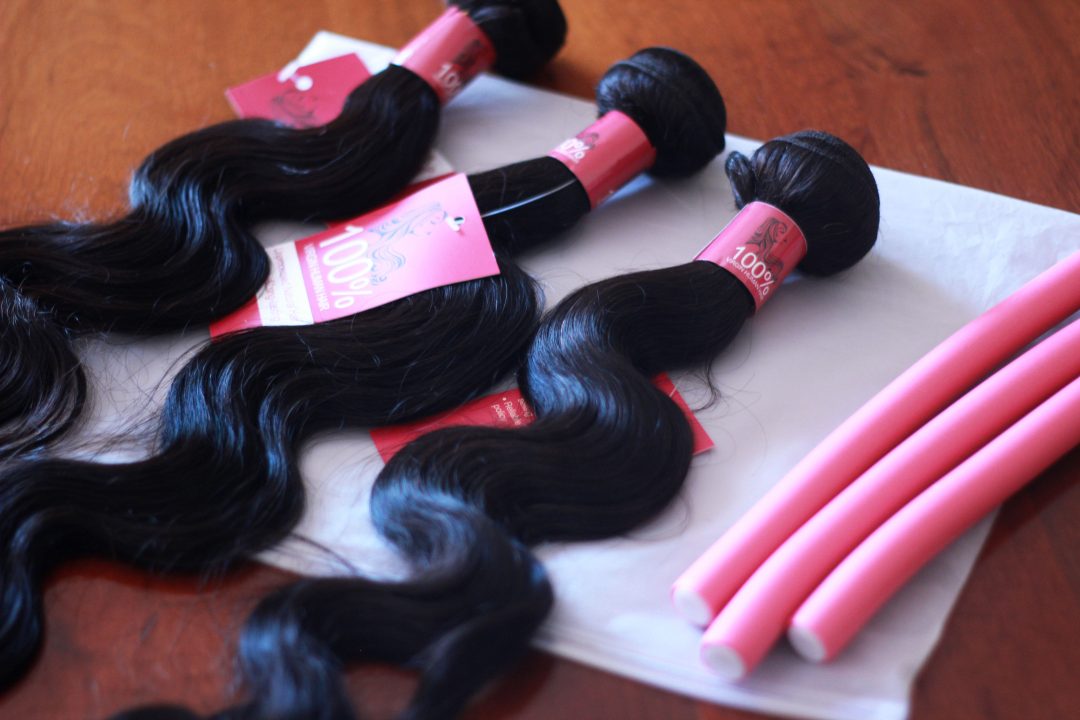
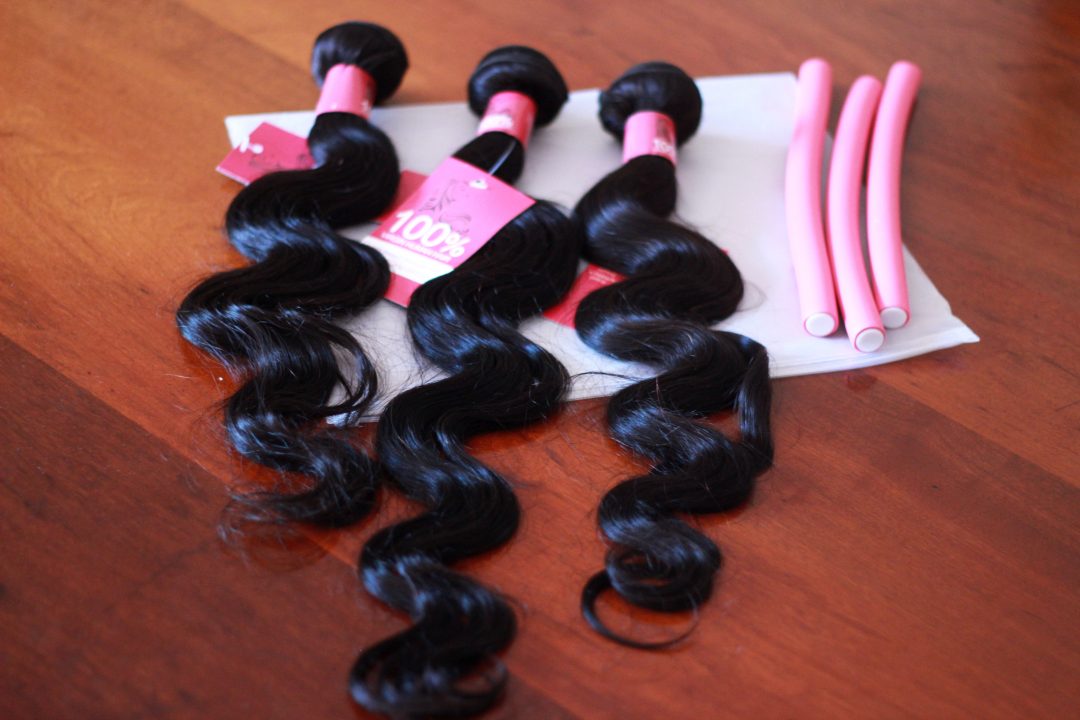
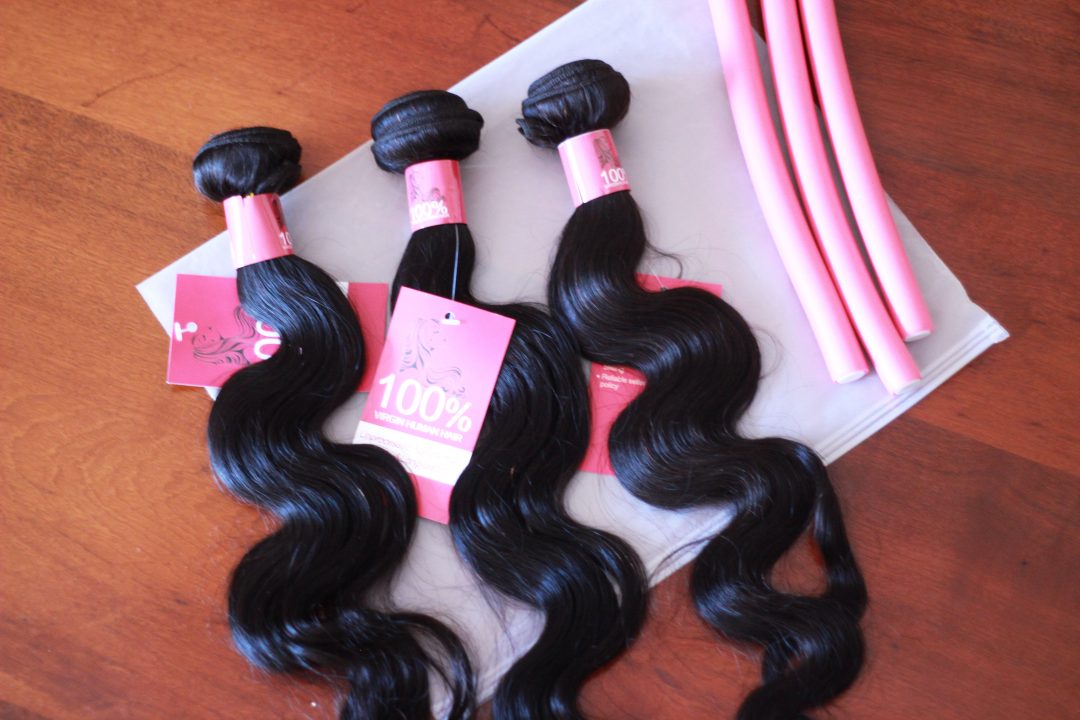
Anyway, I shopped from a store called Gossip Girl Hair on AliExpress over Cyber Monday and I got 3 bundles of Peruvian 7A hair and a lace frontal for $150 (including shipping). The hair was 20″, 22″ and 24″ with an 18″ frontal (not pictured below because I had bleached it and it was drying) and I got a deal because it was 67% off! They used DHL to courier to me and I got it 7 days later (ordered on Monday and received it the following Tuesday). They’re even sensitive to SA’s hectic customs duties. The seller updated me on the delivery of my hair everyday and included some flexi rods in my package. It wasn’t packaged in a box or anything, just an opaque sleeve with each bundle/frontal packaged individually. The hair (upon inspection) did not shed, it had no grey hairs and had a faint smell of what my sister described as cornchips – but it wasn’t anything too traumatising. The hair had more copperish/maroon strands than anything, so the hair seemed a bit different to the 1B colour I was used to. The 24″ bundle also had some shorter strands at the top and thinned out at the bottom. Regardless, I was impressed with my hair! I paid for it myself to practice making a wig so I was glad it wasn’t a waste of my money.
Wig making 101
I am by no means an expert now, but I thought I’d impart some knowledge on how to make a wig since I don’t know of many quality wig makers in SA and I would rather mess up my own wig than pay someone else to do it.
What you need:
- Optional: powder bleach and activator, a bowl and hair dye/relaxer brush and tin foil. And gloves if you want. And shampoo/conditioner
- A wig head/mannequin head
- A wig cap
- Hair clips
- Cork board pins
- Preferably a curved needle, else a thick/long needle
- Black thread
- Sharp tweezers
- A razor/brow razors
- Lots of time
I wanted to experiment with bleaching and tweezing a frontal to make it look more natural but that is not a necessity – well at least the bleaching part isn’t. The point of the bleach is to bleach the knots and the lace to make the frontal look more natural and more like a scalp. The danger with this is that if you use a heavy hand, you can end up bleaching the hair itself. Which is why I was too scared to let the bleach sit for too long, so I washed it off after 10-15 minutes instead of 25-35 minutes. This did help, but it didn’t do a complete job. I followed up by shampooing/conditioning the frontal. Next was the tweezing. This is the thing that you need to practise – and I’ll leave some helpful links below. No one has a naturally perfect, full and luscious hairline and the point of plucking is to thin it out to make it look more natural. I found myself sitting in front of the TV for 4 hours plucking out hair and it still wasn’t enough because I was too scared to do it properly. You have to be a bit careful because if you pull too many hairs at once, you can rip the lace too.
To pluck the hairs, you ideally would’ve pinned the frontal onto the wig cap which is on the wig head. You should always check that the cap fits your head and you can do this by measuring it and stuffing the cap if it’s too small. That way, when you pin the frontal and eventually sew it, it’s flat.
Sewing is the easy part, yet equally tedious and time consuming. I used blanket stitches to sew down both the frontal and the bundles, and I pinned them down to make sure I was sewing them down flat.
Tip: when sewing the bundles, do not cut the weft. This causes shedding. So when you’ve reached the end of one side and you’re flipping it to sew the other direction, put the needle through the weft itself to make sure it sews down flat. If this doesn’t make sense, the videos below showcase it better.
When sewing, make sure your thread is doubled and you always start with the shortest bundle at the bottom and the longest one at the top. I doubled the weft for the first bundle and I sewed a single weft for the second bundle. I bought three but only needed two because the frontal was quite full too.
I prefer hair that is body wave in texture because it’s easier to straighten and it has natural types of waves. Deep wave curls are beautiful but are heavy maintenance and straight hair kinks too easily so you constantly have to straighten it. Loose wave is a great alternative too!
The lucky thing about this process is that if you screw up, just cut the thread and try again! This is why you avoid cutting anything until the very end – especially the lace of the frontal, because you may finish the wig, try it on and want to go back and pluck some more hairs and create baby hairs (that’s what the razor is for – to get a natural cut for those hairs). But once you’re satisfied, you can cut and be done with it. If you find that the cap isn’t secure enough, you can use an elastic band and sew it to both ends of the wig cap by your ears to secure the wig.
Advice and tutorial help
I literally made my wig using Youtube as my guide. I’m going to link a few different videos below that I found helpful and if you have any questions, feel free to troll Youtube some more or ask me! P.S., the first video is by a local Youtuber – Mihlali N – and her video is just featuring some maintenance tips on how to wash/deep condition your wig!
- https://www.youtube.com/watch?v=qdZvyVwmsbo
- https://www.youtube.com/watch?v=oORTtDEgH5k
- https://www.youtube.com/watch?v=XAmdoFvQmz4&t=309s
- https://www.youtube.com/watch?v=E4TYLsZ9Mnk&t=241s
- https://www.youtube.com/watch?v=8CVZi42BOU8
- https://www.youtube.com/watch?v=3CVya3Lsmdc&t=845s
- https://www.youtube.com/watch?v=KPr-ChV_UG8 – VERY helpful!
- https://www.youtube.com/watch?v=YmRfhhLmiVI&t=328s
- https://www.youtube.com/watch?v=pS-i9SYyxQU
- https://www.youtube.com/watch?v=2Gupnm0Zt_4
I hope this blog post has been helpful for anyone considering making their own wig or wanting to buy from AliExpress!

Well, undoubtedly, hair wigs are far better than weaves. I usually put on my wig in morning and take it off before going to bed. I loved AliExpress and will recommend the same to my friends. Really impressed with the wig making tutorial! Looking forward to more similar posts!
Hair wigs is best. We can add any hair style for any occassion.
Hey just curious, now that you’ve had the hair for a while what do you think of it now? And I’m terms of reusage would you still recommend it?
Author
I would recommend it, but I’m definitely open to shopping around and trying some other stores I’ve seen.
I would always recommend using human hair as they are the best quality and they last the longest.